

Start here
Push or fold?
Weigh risk against value.
Consider whether advancing your hand is worthwhile, which tiles are safe against which opponents, and how turn number and score gaps affect the decision.
Three things to remember
- Check the safety evidenceUnderstand genbutsu, suji and kabe
- Assess your handShanten, wait and scoring potential
- Read the situationInclude turns, dealer status and score gaps
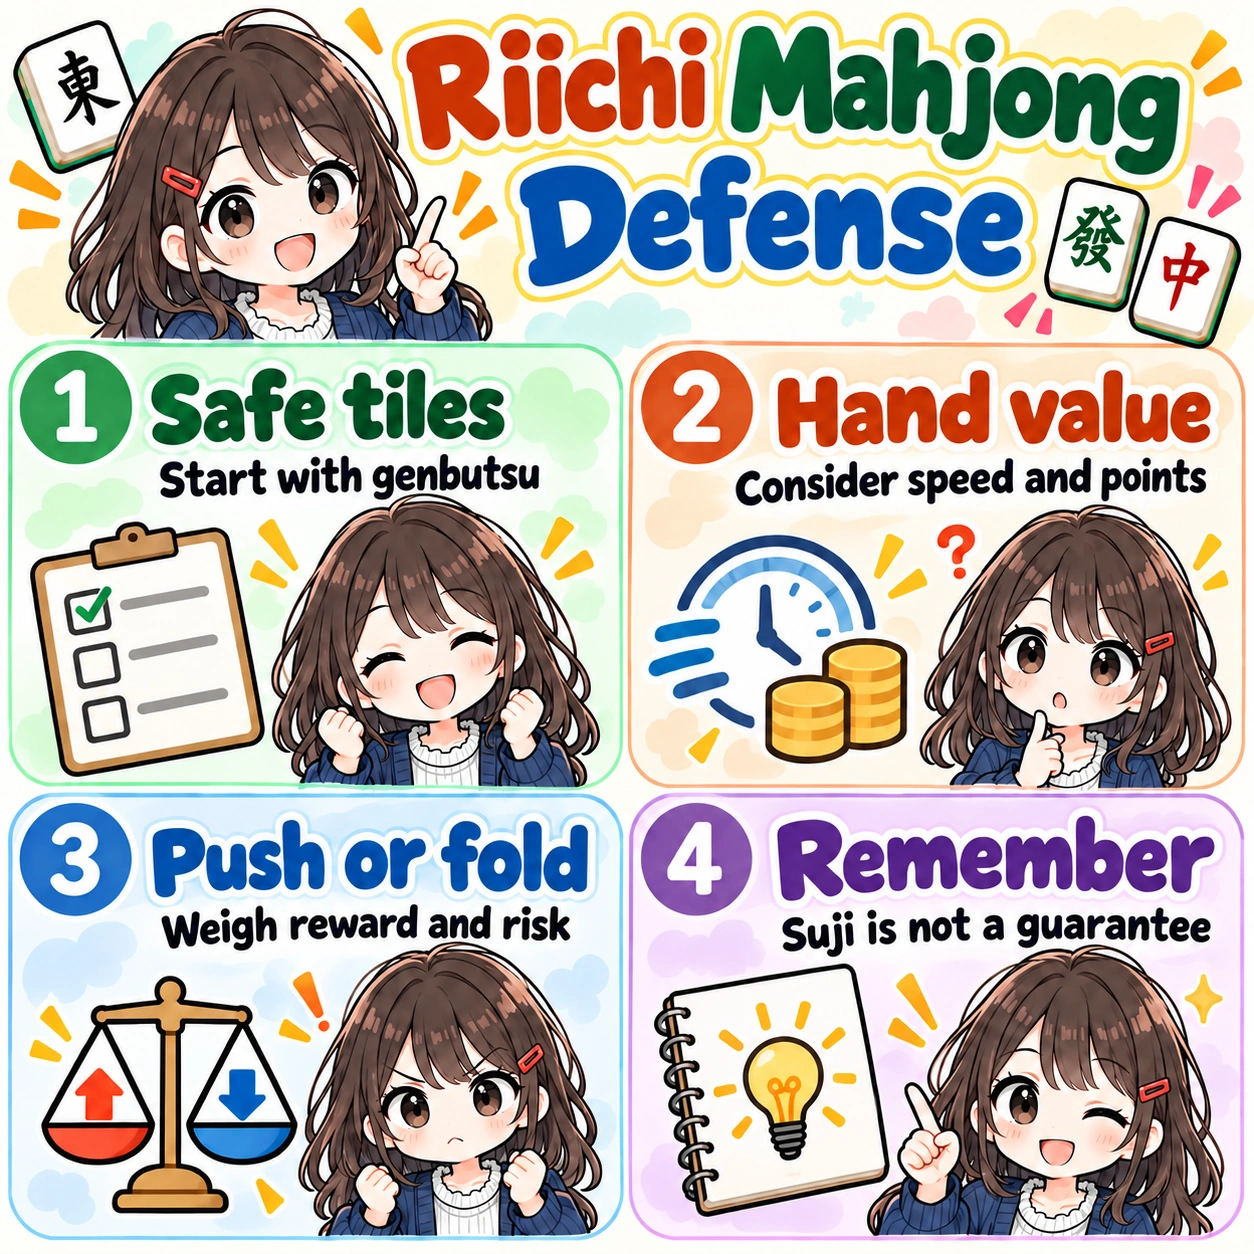 Enlarge the illustration ↗
1. What to check after an opponent's riichi
- Identify the riichi player and any other opponents who are attacking
- Look for genbutsu in the target player's discards
- Check your shanten
- Estimate hand value and, if in tenpai, wait quality
- Check turn number, dealer status, scores and placements
- Choose to push, maneuver or fully fold
The first thing to do after an opponent declares riichi
After riichi, first decide which opponent you are defending against. The riichi player is the priority, but an expensive-looking open hand or an attacking dealer may require safety against several players.
The same tile can be genbutsu against the player to your left, suji against the player opposite and non-suji against the player to your right. Ask against whom it is safer, and on what evidence, rather than simply calling it safe.
Following this order reduces vague decisions such as folding because a tile looks dangerous or pushing merely because you are in tenpai.
Compare discard risk with the value of pushing
What does push or fold mean?
To push is to pursue a win or tenpai despite discarding tiles that could deal in. To fold is to abandon or delay your own win to avoid dealing in. Giving up the win entirely and continuing to discard safer tiles is full defense (betaori).
The basic push-or-fold judgment
The central comparison is the benefit of pushing versus the risk of dealing in. A good-wait mangan tenpai offers more reason to take a risk. A cheap two-shanten hand late in the round is far from winning and can lose much more by dealing in, making defense more attractive.
| Factor | Favors pushing | Favors folding |
|---|---|---|
| Hand progress | Tenpai | Two-shanten or farther |
| Value | High | Low |
| Wait and shape | Good wait, many unseen copies | Poor wait, few unseen copies |
| Turn number | Early | Late |
| Opponent | Non-dealer, apparently cheap hand | Dealer, apparently expensive hand |
| Placement situation | A win has high value | A deal-in would be decisive |
Choosing a safe tile and deciding to push or fold are different decisions
Genbutsu and suji help assess a tile's danger. Push-or-fold judgment asks whether advancing the hand is worth taking that risk. Sometimes pushing a relatively dangerous tile is justified; sometimes you should break the hand to defend even when the available discard is suji.
Six criteria for push-or-fold decisions
After comparing safety, assess the value of pushing using these six factors. Combine them rather than deciding from just one.
- Shanten: Tenpai, one-shanten and two-shanten or farther differ greatly in distance to a win.
- Value: A 1,000-point hand and a mangan hand justify different levels of risk.
- Wait and unseen copies: Check wait quality and how many winning tiles are already visible.
- Turn number: Early in the hand many draws remain; late in the hand there are fewer chances to win.
- Opponents: Consider dealer status, estimated value and how many players are attacking.
- Score gaps, placement and rounds remaining: Check how a win or deal-in could change final placement.
| Conditions | Lean toward pushing | Lean toward folding |
|---|---|---|
| Shanten | Tenpai | Two-shanten or farther |
| Value | High-value hand | Cheap hand |
| Wait | Good shape | Poor shape |
| Turn number | Early | Late |
| Opponent | Non-dealer riichi | Dealer riichi or multiple threats |
| Placement | Need a win | Need to avoid dealing in |
2. Find safer tiles using genbutsu, suji and kabe
What is a safe tile?
A safe tile is unlikely to be ronned by a particular opponent, but the degree of safety depends on the evidence. Do not equate genbutsu, which that opponent cannot ron, with suji, which rules out only certain waits.
| Safety | Tile category | Basic reasoning |
|---|---|---|
| Very high | Genbutsu | The target opponent cannot ron it |
| High | Honors the opponent cannot use in a standard hand, for example | Check visible copies and exceptional hand shapes |
| Relatively high | No-chance | Rules out specific two-sided waits |
| Moderate | Suji | Rules out some two-sided waits |
| Somewhat low | One-chance | The opponent may hold the last needed copy |
| Low | Non-suji | No clear safety evidence |
Danger changes with tile position, visible copies, opponents' discards and calls, and turn number. Special shapes such as thirteen orphans and seven pairs also differ from four sets and a pair.
Genbutsu: the first tiles to look for when defending
Genbutsu are tiles already discarded by the opponent you are watching. An opponent cannot ron when their wait includes one of their own discards, so genbutsu cannot deal into that player. If you decide to fully fold, look for genbutsu first.
Genbutsu is safe only against that opponent. If the player to your left discarded 4 characters, either of the other players can still ron it. Against two riichi players, one player's genbutsu may be dangerous to the other.
A tile discarded by someone else and passed after riichi also remains safe against the riichi player's fixed wait. An open-hand player who has not declared riichi can change their wait, so a tile that passed once may not remain safe for the rest of the hand.
With several genbutsu choices, consider future turns too. An order that preserves tiles safe against multiple players, or tiles likely to remain safe, makes continued defense easier.
What is suji?
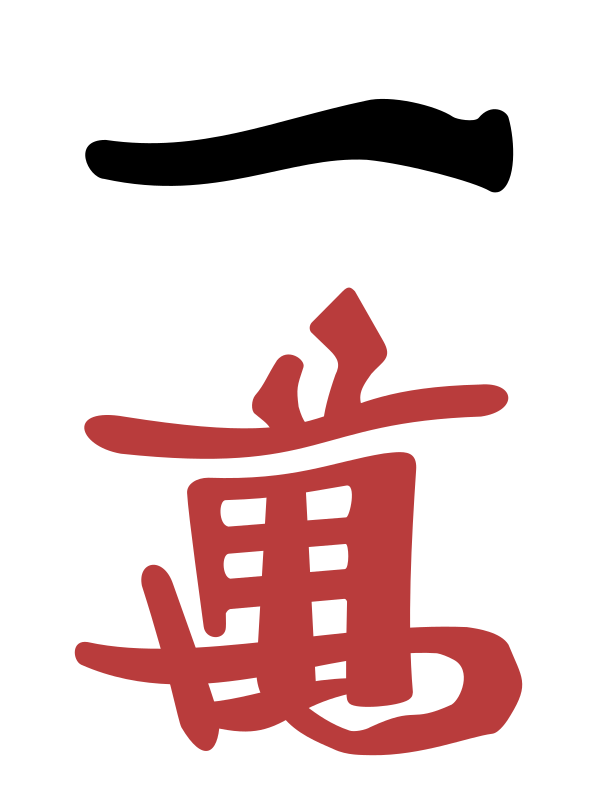
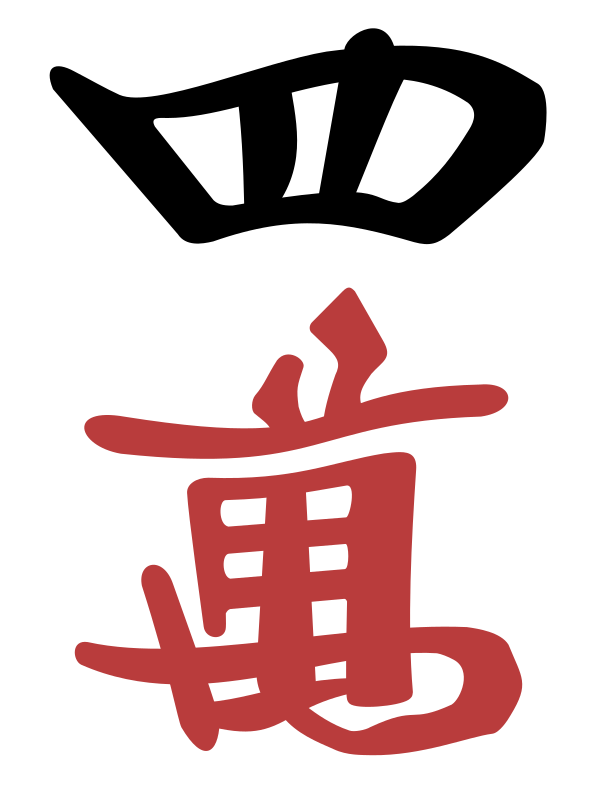
Suji uses two-sided waits and furiten to reduce estimated danger. Remember the three number families: 1–4–7, 2–5–8 and 3–6–9.
| Target player's genbutsu | Tiles made less dangerous by suji |
|---|---|
| 4 | 1 and 7 |
| 5 | 2 and 8 |
| 6 | 3 and 9 |
The 1–4–7 suji family
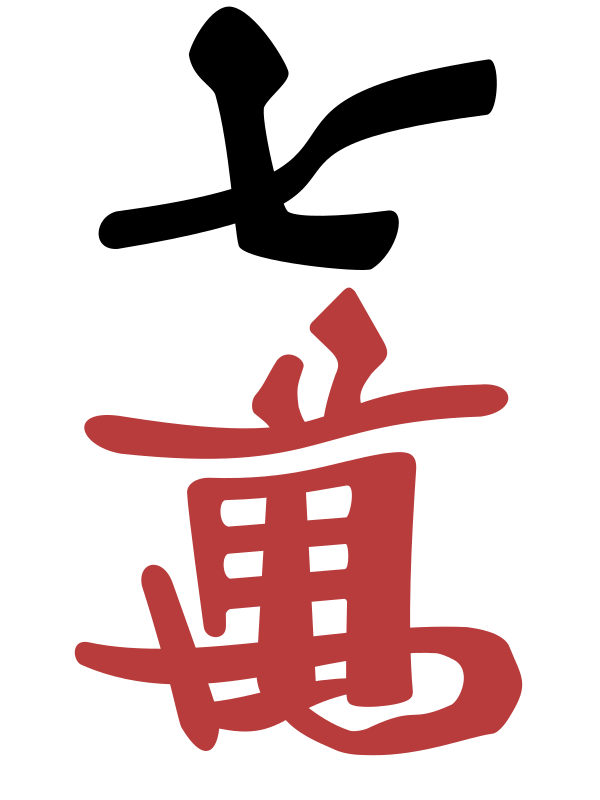
The 2–5–8 suji family

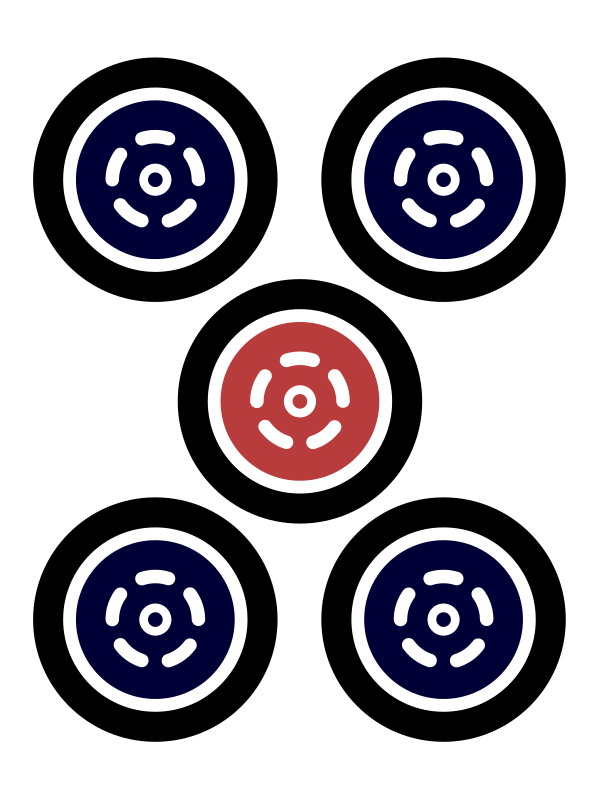
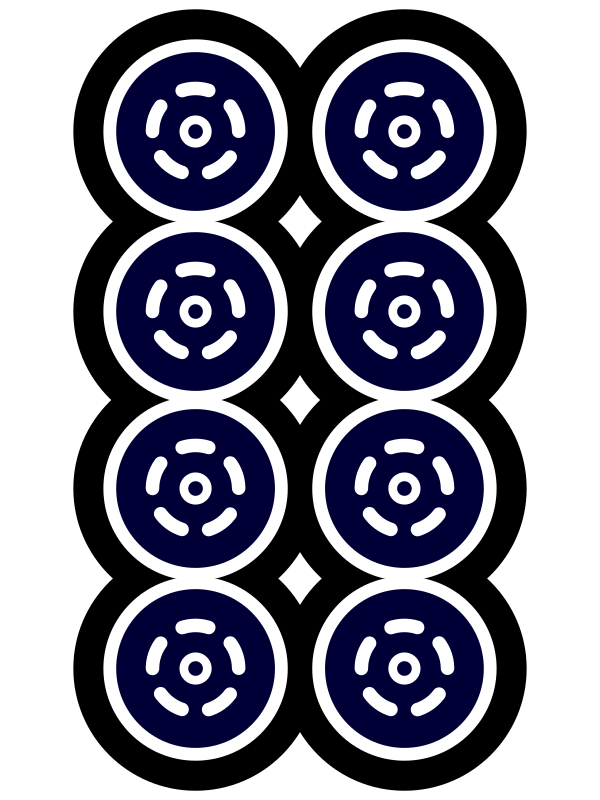
The 3–6–9 suji family
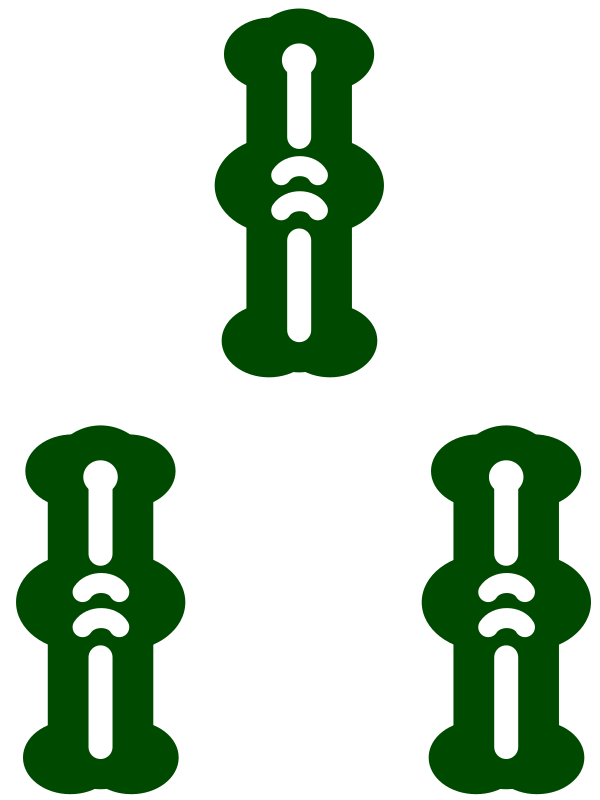
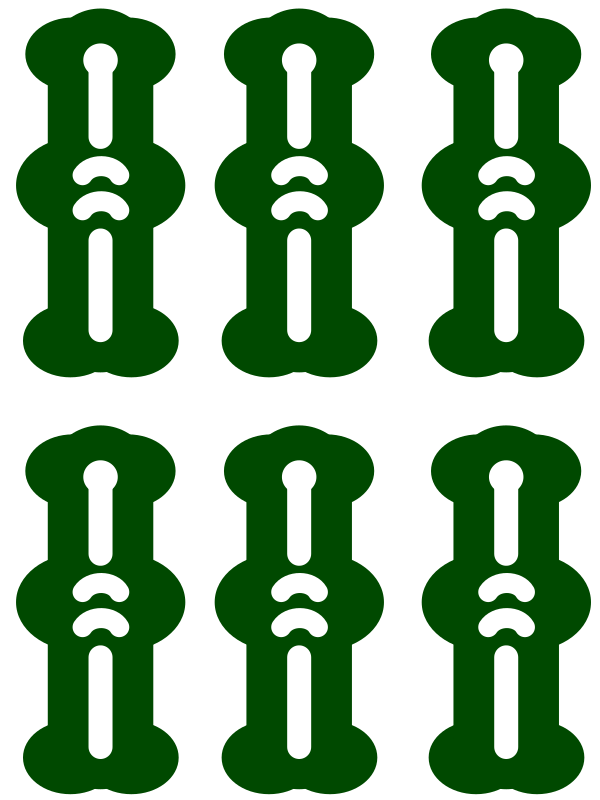
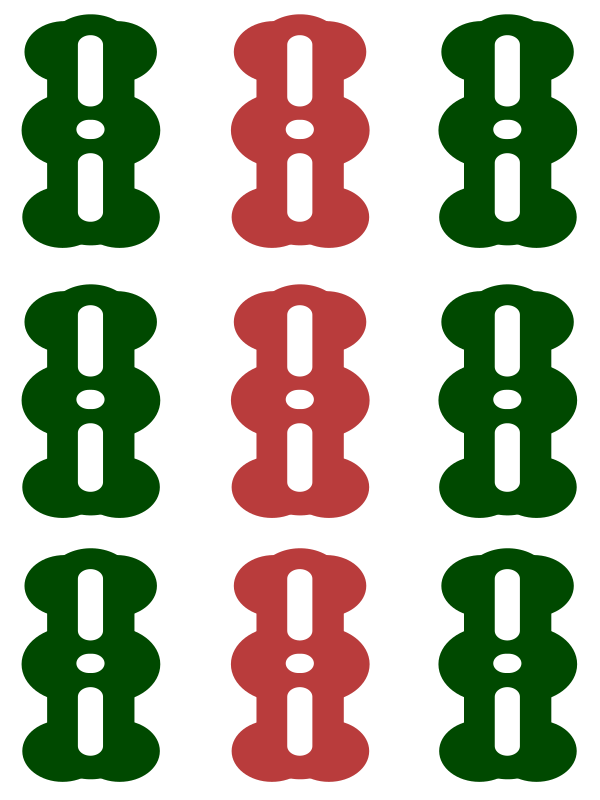
For example, if 4 characters is safe against an opponent because of furiten, the two-sided waits formed by 23 or 56 characters would also be furiten, since they include 4 characters. This reduces the chance that 1 or 7 characters deals into those shapes. Suji protects only against some two-sided waits: it gives a reason for lower danger than non-suji, not a guarantee of safety.
Why can suji still deal in? Waits it does not rule out
Suji reasoning addresses two-sided waits. It does not rule out single-tile, double-pair, closed or seven-pairs waits.
| Wait | Does suji reduce the danger? |
|---|---|
| Two-sided wait | ○ |
| Closed wait | × |
| Edge wait | Generally requires separate assessment |
| Double-pair wait | × |
| Single-tile or seven-pairs wait | × |
Even with 4 characters genbutsu, 1 characters can hit a single-tile wait
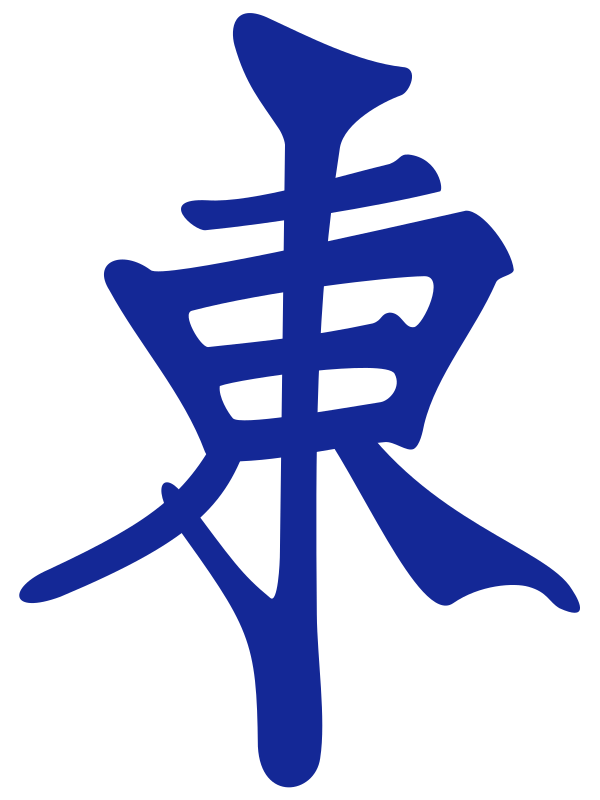
It can also hit a double-pair wait on 1 characters and East
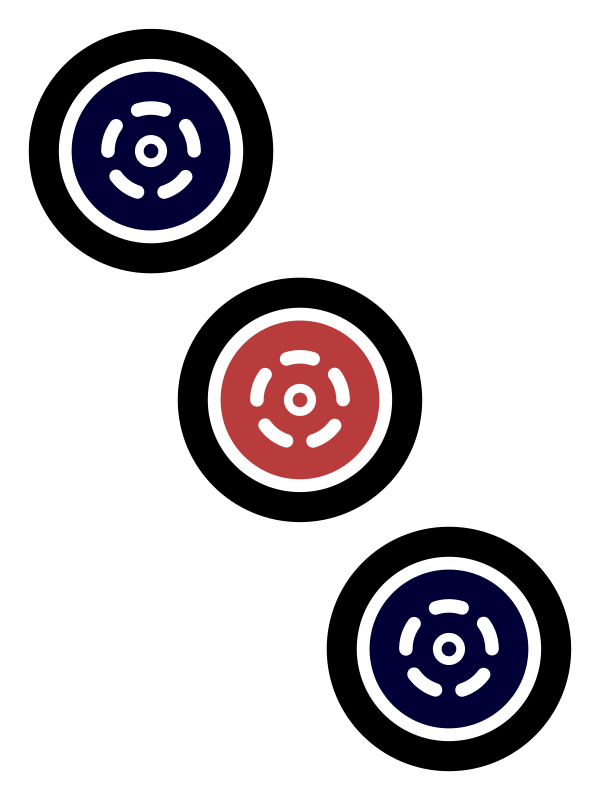
Even with 5 circles genbutsu, 13 circles can wait on 2

Kabe: use visible tiles to narrow possible waits
Kabe, or a tile wall, uses the number of visible copies to restrict the sequences an opponent can hold. Your hand, all discards, exposed sets and dora indicators all count as visible tiles.
If all four 3-character tiles are visible, an opponent cannot hold 23 characters. They therefore cannot wait on 1 characters through that two-sided shape, reducing its danger against two-sided waits.
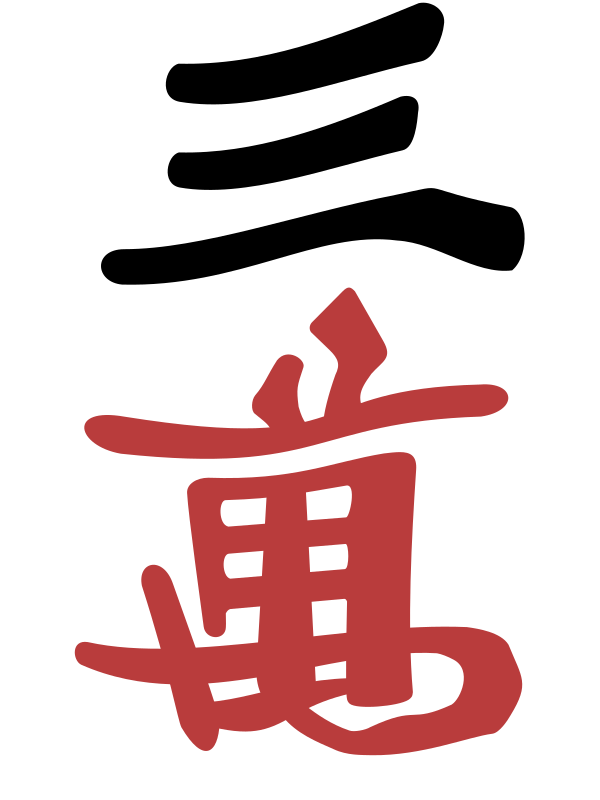
Count the tiles needed to form the opponent's wait, not just the tile you want to discard. Kabe mainly narrows sequence waits; it does not rule out single-tile or double-pair waits.
What is no-chance?
No-chance means all four copies of a tile needed for a particular two-sided wait are visible. With all four 3-character tiles visible, the opponent cannot hold 23 characters, so 1 characters cannot hit that two-sided wait.
| Item | Genbutsu | No-chance |
|---|---|---|
| Can the target opponent ron it? | No | Still possible |
| Reason | Furiten | Remaining tile copies |
| Two-sided wait | Prevents it | Prevents some cases |
| Single-tile and double-pair waits | Prevents it | Does not prevent them |
No-chance often provides stronger evidence than suji, but it is not genbutsu. When fully folding, generally use available genbutsu first.
What is one-chance?
One-chance means three copies of the required tile are visible. The opponent can still form the two-sided wait if they hold the last copy, so it is less safe than no-chance.
You do not know whether the last unseen copy is in the wall or the opponent's hand. Especially late, when hands are developed, do not dismiss the possibility that it is in use. Treat one-chance as one clue when comparing safety without genbutsu, and do not overtrust it.
How safe are honors?
Honors form no sequences, so they have no suji relationships. Assess safety from visible copies, value-honor status and whether the opponent could have seven pairs or thirteen orphans.
| Situation | Basic reasoning |
|---|---|
| Three copies visible outside your hand | Your fourth copy is very safe against standard shapes |
| Two copies visible | Single-tile waits can remain |
| One copy visible | The opponent can still hold a pair |
| Live tile: no public copies | Watch for calls and double-pair waits on value honors |
If no copy of a value honor is public, an opponent may hold a pair or concealed triplet of that dragon, seat wind or round wind. Conversely, if three copies are visible outside your hand and you hold the fourth, it cannot be used against you in a standard hand or seven pairs. Exceptions such as thirteen orphans remain.
Try it in MemoJong: Record game results and review your performance →
3. Choose to push, fold or maneuver
What is full defense (betaori)?
Full defense abandons your own win and prioritizes avoiding a deal-in. Continue choosing safer tiles even if that breaks tenpai or a valuable hand.
After deciding to fold, discarding suji or non-suji first to preserve your shape produces halfhearted defense. Start with genbutsu and plan a discard order that preserves safe choices for later turns. Think beyond one safe discard: how many turns can you survive until the hand ends?
What is maneuvering (mawashiuchi)?
Mawashiuchi means discarding relatively safe tiles while preserving a route back to tenpai or a win. Your choices are not limited to pushing directly or folding completely.
It can work with a valuable one-shanten hand if a genbutsu discard preserves shanten, or if you can hold dangerous tiles and wait for safe improvements. But if safe discards barely advance the hand, or winning still requires passing several dangerous tiles, fully folding may be better than forcing a comeback.
Can you push against riichi whenever you are in tenpai?
Tenpai increases the value of pushing. A high-value, good-wait hand that needs only one dangerous tile to pass is especially attractive.
Tenpai is not an automatic reason to push. A 1,000-point poor wait, almost no unseen winning tiles, several non-suji discards against dealer riichi, or few remaining turns can make breaking tenpai and folding the better choice.
| Your hand | General judgment |
|---|---|
| High value, good wait | Favors pushing |
| High value, poor wait | Depends on turns and opponent |
| Cheap hand, good wait | Depends on dangerous discards and placement |
| Cheap hand, poor wait | Favors folding |
How far should you push at one-shanten?
One-shanten is one step from tenpai. It looks close, but you still need to reach tenpai and then obtain a winning tile, so the gap from tenpai is substantial.
Consider pushing or maneuvering with many good-wait improvements, high potential value, many draws left, or a route to tenpai through safe discards. Lean toward folding if a cheap, poor-shape hand requires several dangerous discards. Check which tiles reach tenpai and the waits afterward, not just the label “one-shanten.”
Should you normally fold at two-shanten or farther?
At two-shanten or farther, the hand needs several improvements before it can win. From the middle of a hand onward against riichi, the chance of your own win is usually low compared with the risk of dealing in first, so defense is generally favored.
Placement conditions can still justify pushing a distant hand—for example, last place in the final round with no way to improve placement except winning. Distinguish ordinary expected value from the result you specifically need.
4. Consider value, wait, turns and placement
How does hand value affect the decision?
Higher-value hands offer a larger reward and are easier to justify pushing. Passing several dangerous tiles against the dealer for 1,000 points differs greatly from risking one tile with good-wait mangan tenpai, even at the same deal-in probability.
| Estimated value | General incentive to push |
|---|---|
| 1,000 points | Low |
| 2,000 points | Lower |
| 3,900–5,200 points | Moderate |
| Mangan | High |
| Haneman or higher | Very high |
Even an expensive two-shanten hand is far from winning late in the round. Conversely, a 1,000-point final-round win that improves placement can be very valuable. Consider the score's effect on placement, not only its size.
Good and poor waits change the decision
A two-sided wait offers at most two types and eight winning tiles. Closed and edge waits offer at most one type and four copies, fewer after subtracting visible tiles. A double-pair wait has two types but uses two copies of each already, leaving at most four.
Ask whether the hand is likely to win, not merely whether it is in tenpai. Many visible winning tiles weaken even a good wait. A poor wait can still justify pushing if useful copies seem likely to remain and the hand is valuable.
How does turn number affect the decision?
Early in a hand, many draws remain to improve and win. In the middle, compare hand value with danger. Late in the hand, fewer chances remain, so pushing dangerous tiles from outside tenpai is often less worthwhile.
Late, tenpai payments at an exhaustive draw also matter. Maintaining tenpai safely has value, but avoiding a noten payment may not justify a large deal-in risk. Weigh remaining draws, the number of dangerous tiles to pass and the possible loss.
Dealer riichi versus non-dealer riichi
Dealer wins score more, so dealing into dealer riichi generally costs more. A dealer win also repeats the dealer turn, affecting the remaining game. With the same hand and dangerous tile, assess dealer riichi more cautiously.
Non-dealer riichi is relatively easier to push against, but visible dora and other information may indicate high value. Do not use a rigid “fold against dealer, push against non-dealer” rule; compare the opponent's value with your own winning value.
Your own dealer status matters too
As dealer, your wins score more and let you retain the dealer turn. A valuable good-wait tenpai therefore often offers more reason to attack than it would as a non-dealer.
Being dealer does not justify every push. A cheap two-shanten hand or late poor-shape one-shanten hand may still warrant folding if it requires several non-suji discards against an apparently expensive riichi.
How to defend against two or three riichi players
With multiple riichi players, a tile safe against one may threaten another. First look for common genbutsu safe against everyone. If none exist, assess each opponent separately using genbutsu, suji and kabe.
A non-suji discard can now deal into more than one player, raising the risk. Even in tenpai, cheap hands and poor waits need a stronger reason to push. If safe tiles run out, also consider which opponent's win would hurt your position most.
Push-or-fold decisions against open hands
An open-hand player may also be in tenpai. Estimate value and possible waits from visible information: the chosen suit and honors for a flush, potential pairs for toitoi, or the last value honor when a yaku depends on a later call.
A riichi player's wait is generally fixed, while an open-hand player can change shape and wait with each hand discard. A tile that passed once may no longer be safe. Reassess hand discards versus drawn-tile discards, calls, dora and unseen counts each turn.
The final round changes the priorities
In the final round, the effect on final placement matters more than the raw winning score. In last place, a win that improves placement can justify extra risk. In first place, if a deal-in would surrender the lead, defense becomes more valuable.
| Situation | General approach |
|---|---|
| Last place; a win improves placement | Lean toward pushing |
| Third place; second is reachable | Consider required value and placement after a deal-in |
| Second place; first is reachable | Depends on gaps and conditions |
| First place; a deal-in loses the lead | Favor defense |
Check your placement after a win, a deal-in and an opponent's tsumo. With uma and oka, also consider the value of moving up or down one place.
5. Compare situations requiring the same dangerous discard
The same dangerous tile can call for a different decision
Compare situations where you would discard a 4 characters that has not passed against the opponent.
Good-wait mangan tenpai against non-dealer riichi
Mid-hand, with good-wait mangan tenpai against a non-dealer, lean toward pushing if passing one 4 characters maintains the wait. You are close to winning and the reward is substantial.
Poor-wait 1,000-point tenpai against dealer riichi
With a 1,000-point poor wait against the dealer, lean toward folding if you must pass more non-suji tiles after 4 characters. The possible loss is large relative to the reward.
Two-shanten late in the hand
Late, far from winning and with safe tiles available, generally favor folding. Few draws remain, and even if 4 characters passes, the hand cannot immediately compete.
Final-round placement conditions
In last place needing a win, lean toward more aggression; in first place where a deal-in loses the lead, favor more defense. The same 4-character discard can warrant opposite decisions in different situations.
| Conditions | Case A | Case B |
|---|---|---|
| Hand | Mangan tenpai | Cheap two-shanten hand |
| Shape | Good shape | Not in tenpai |
| Turn number | Middle | Late |
| Opponent | Non-dealer | Dealer |
| Dangerous tile | 4-man | 4-man |
| Decision | Lean toward pushing | Lean toward folding |
A push-or-fold decision is not permanent
Pushing one tile does not commit you to pushing every later tile. Reassess if another player declares riichi, winning tiles become visible, several more dangerous discards are needed, or your hand's value falls.
Conversely, maneuvering through safe discards may restore a valuable good-wait tenpai and justify switching to attack. Update the decision on every turn, not just once per hand.
6. A checklist for reviewing game logs
Common beginner push-or-fold mistakes
- Always folding against riichi: Giving up even high-value good-wait tenpai loses winning opportunities.
- Always pushing in tenpai: Cheap hands, poor waits and dealer riichi can favor defense.
- Treating suji as guaranteed safe: It rules out only some two-sided waits.
- Overtrusting one-chance: The opponent may be using the last copy.
- Treating one player's genbutsu as safe against everyone: Genbutsu is opponent-specific.
- Not counting your hand for kabe: Count every tile visible to you.
- Treating dealer and non-dealer identically: Dealing into the dealer usually costs more.
- Ignoring placement: In the final round, placement changes matter more than raw hand value.
- Continuing to push because you already pushed: Update the conditions each turn.
- Judging only by the deal-in result: Review using information available at the decision.
What to record for a push-or-fold review
For a difficult decision, record the evidence, not just the outcome.
| Record | Details |
|---|---|
| Turn number | Which turn it was |
| Your hand | Tenpai, one-shanten and so on |
| Value | Estimated winning score |
| Wait | Good or poor wait and unseen copies |
| Opponent | Dealer or non-dealer; riichi or open hand |
| Dangerous tile | What you pushed and the evidence for safety |
| Safe tiles | How many genbutsu you held |
| Score situation | Placements, score gaps and rounds remaining |
| Decision | Push, maneuver or full defense |
| Outcome | Win, deal-in, drawn hand and so on |
Use game logs to review information available at the discard. Across your overall results, compare deal-in rate, win rate, average hand value and average placement.
References
- M.League official match rules (furiten, riichi and tile-set rules underlying defensive decisions)
- M.League official statistics (deal-in rate, win rate, average placement and other measures)
- Estimating waits by considering a riichi player's hand (J-STAGE)
- Mahjong analysis through game-log analysis (Journal of the Japanese Society for Artificial Intelligence)
Decisions vary with the ruleset, turn number, visible tiles, and opponents' discards and calls.
Related guides
 What is mahjong tile efficiency?Understand shanten, ukeire and five-block theory
 Riichi Mahjong Yaku ListCheck yaku, han values and calling restrictions
 How to Calculate Mahjong ScoresEstimate hand value to assess whether pushing is worthwhile
 Understanding average placement in mahjongRead results alongside top, last-place and deal-in rates
 Calculating Mahjong Net ResultsCheck how uma and oka affect placement incentives
 Mahjong House Rules TemplateAgree on starting points, uma and end-of-game conditions before playing